Digital photography is fundamentally a computer based hobby. As such, you will initially face a host of predominantly technical decisions, For example, what hardware (camera body, lens and accessories) and software (downloading, enhancing and archiving) to use and how to structure workflow. Your wallet and level of computer expertise will obviously influence these decisions. From our perspective, although we are somewhat computer literate, we wanted good basic starting equipment without having to refinance our home. We had an initial bias toward Web graphics with a longer term view to producing prints. No matter what end result you have in mind, your initial choices will require a basic minimum feature set. You will soon find there is quite a hardware disparity between photographing Hummingbirds in the dark and Alaskan Brown Bears from six feet! Lens choice, for example, is a function of the light you typically expect to be working in, the size and movement of the subject and how close you can reasonably expect to get. Your camera body and post-processing software must possess specific features to make your life easier while in the field and later at the computer.
In this synopsis, we will summarize our experience to date in choosing and upgrading equipment. As digital technology applied to camera bodies is changing at a frenetic pace, our equipment is far from up-to-date. Nor does it have to be to take satisfying images. As you will see below, our advice is to ensure you acquire a camera body with a minimum feature set combined with a quality lens. After reading this section, it's best to do some basic research to determine just how advanced some of the equipment is becoming prior to making your choice.
Digital photography was in an embryonic stage when we were getting underway. Although choice today is certainly broad from a manufacturer perspective, you will still face the Canon - Nikon controversy as they dominate the action photography marketplace. This is akin to the Mac - PC debate. We don't really feel there are any other serious contenders if bird, wildlife and natural landscape photography is your ambition. We chose Canon. The images presented in our Early Galleries were taken with a borrowed Canon D30 digital camera body, a Sigma 50-500mm, f/4.0-6.3 EX telephoto lens and an inexpensive Velbon CX586 tripod. After roughly a year in the field, with few exceptions, this equipment proved not a bad first choice. However, being early adopters we suffered many setbacks as the inevitable "bugs" worked their way through the development process. This equipment was really functionless compared to the feature sets currently available. Today, the hardware and software choices have reached a phenomenal level of sophistication. Software integration, chip speed, and vast improvements in metering and focus algorithms have eliminated many of the problems associated with basic camera operation, reliable color management and printing. Nonetheless, the basic feature set required to meet the challenges of bird, wildlife and natural landscape field work haven't changed all that much. A review of this synopsis will give you a better idea of how to choose equipment and what subsequent upgrade steps we have taken to expand our field opportunities and improve the quality of our output.
From our perspective, achieving a good initial result is simply a function of utilizing a quality "all purpose" lens with a digital Single Lens Reflex (SLR) camera body that has a basic feature set needed to photograph birds, wildlife and the wide light variances generally encountered with landscape photography. Although equipment choice is seemingly endless, we would argue that it is simply a waste of time to start with a minimally featured camera body and poor quality lens. Besides autofocus, some camera "musts" are exposure compensation (essential as you learn to interpret color and lighting conditions), a wide selection of ISO settings (required for lighting extremes), a good frame rate and buffer capability (to facilitate action shots), highlight alert (for instantly assessing exposure problems), mirror lockup (to reduce vibration during long shutter speeds), auto exposure bracketing (AEB) capable of sequencing a minimum of 3 to 5 images (essential for handling extreme lighting conditions where the intent is to post-process using High Dynamic Range software), a large LCD screen (essential for instantly reviewing images and isolating mistakes, assessing composition or fine tuning focus), a depth of field preview button, sufficient megapixels to create large prints and a viewfinder conducive to your eyesight. Lastly, many quality camera bodies come with a "Live Mode" feature that allows histogram assessment in real time. We feel this latter feature is a definite must as it shortens the time required to compose and focus a landscape image (it facilitates instant histogram changes and, in conjunction with the zoom and depth of field buttons, makes focusing on screen a breeze).
Unlike past issues of our blog, we're not going to make any specific camera body recommendations as technology is simply changing too fast. Use the above essential features as a guide and do your homework.
As there are few digital cameras capable of capturing the equivalent of one frame of 35mm film, you will also want to assess the camera sensor size as it will have a multiplying influence on the focal length of the lens you are using. A good resource for understanding lens choice and functionality are the reviews available through The-Digital-Picture. As you will encounter wildlife in varying degrees of light, distance and movement, you should ensure your initial lens choice has a specific set of adaptive features. From a practical perspective, this should be predicated on nothing more than an "all purpose" lens to start. For birds and wildlife, this is easily satisfied with the Canon EF 100-400mm, f/4-5.6 IS USM lens. For landscapes, a good choice is the Canon EF 24-105mm, f/4L IS USM lens. For us, there is no other logical starting point.
Surprisingly, Best Buy has produced a good Lens Buying Guide for beginners, including how to choose the right lens for your camera body and photography interests. Many thanks to a member of Kelly Moore's New Life Community Club for recommending the link. They are a Montana group experimenting with wildlife photography and used the guide when purchasing equipment.
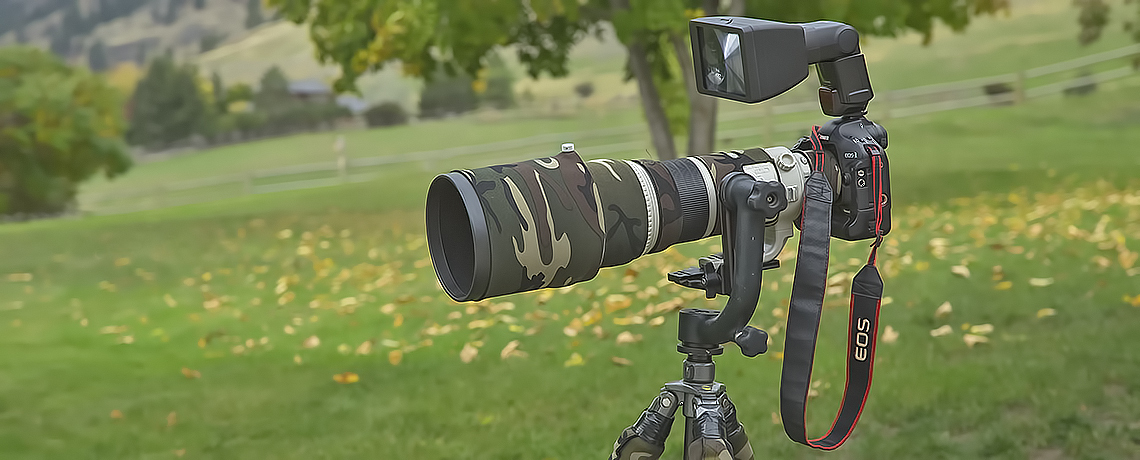
A pop-up flash will be largely a useless feature. We use a Canon Speedlite 580EX on the camera hot shoe for distances up to roughly 20 feet and attach a Harbor Digital Design flash extender for longer shots. Ensure your camera and flash have ETTL (Electronic Through The Lens) and "high-speed sync" capability. These features have significantly reduced much of the complexity surrounding the use of flash and make it much easier for the beginner to ensure that images are not over or underexposed. Although volumes have been written about flash, we would suggest the appropriate starting point would be an article at Naturescapes by Ralph Paonessa (High-Speed Sync For Flash At Any Shutter Speed). While you're there, check out Greg Downing's writeup on flash extension (Getting The Most From Your "Better Beamer" Flash X-Tender). Both should be in the Archives.
We have actually evolved through several camera bodies and made other lens choices over time. This is simply a function of field experience and frustration as technology changes. For example, on an early trip to Hyder, Alaska we discovered how difficult it was to photograph moving subjects in low light with our initial digital camera body and telephoto lens in terms of getting a sharp image with sufficient depth of field to make a pleasing Web graphic or print. It was becoming patently obvious that we needed both a faster lens and a digital body with better focus and ISO algorithms. We opted for a Canon EF 300mm, f/2.8L IS USM and Canon EOS-1D Mark II N respectively. The former is not a heavy lens and is absolutely a gem for handheld flight photography. The latter was an easy choice as it had arguably the best autofocus available in that price range at the time. Moreover, after meeting other photographers in the field, we decided that a Canon EF 500mm, f/4L IS USM was a good all-round natural progression to gain a lightweight distance advantage.
We also had an epiphany while photographing Brown Bears at Brooks River in Alaska as we definitely missed some good action shots that were just out of range for our existing equipment. Photographers using a long lens with Canon 1.4X or 2.0X extenders were having a field day! These are absolutely essential as they provide the ability to overcome distance in situations where it might be too dangerous to approach closer or when moving forward will unnecessarily stress the subject.
We generally separate while in the field and shoot at different locations. As we became progressively more serious, it was obvious that we needed backup if either camera body failed for any reason. Moreover, we soon discovered that wildlife generally move quickly and, more often than not, don't wait for you to change to a more appropriate lens. It's especially frustrating using a long lens when the subject suddenly decides to take a closer route. In this situation, you are often forced to compose portrait shots that may be less than optimal. Moose or larger birds are good examples as they often come so close that a long lens is simply rendered ineffective. A good choice here is the Canon EF 70-200mm, f/2.8 L IS USM. Carrying a handheld backup with an intermediate lens makes life a lot easier.
The above hopefully gives you an indication of what logical progressions you will undoubtedly encounter as you gain field experience. As you can see, we carry a diverse lens selection, share our equipment and use a main and backup concept for our camera bodies.
Choosing peripheral equipment is a matter of what you deem essential to support yourself in the field. In our experience, having the right equipment at hand, being dry and comfortable will definitely enhance your field experience. Here are a few things to think about.
Uppermost is the use of a long lens, usually 500mm or greater. Here you will need a sturdy tripod and head. Without exception, the preferred choices appear to be Gitzo and Wimberley respectively. A word of caution though. Gitzo has historically given many photographers nightmares for three reasons: the metal housing that supports the upper graphite legs can crack in cold weather; the friction grip that supports the head can loosen; and, the leg twist clamps must all be secure to ensure proper support (the clamps must be constantly checked as any loose fitting will result in the destruction of camera body and lens). In fact, our Gitzo cracked in cold weather while on a winter shoot in Quebec. We've also witnessed tripods collapse on many occasions due to loosely tightened legs with the horror of completely destroying the attached camera body and long lens. As such, we've changed to the Manfrotto design, a 055CXPRO3. It is light and easily set up as the legs are secured with clamps rather than a twist mechanism. Nonetheless, a tripod must be constantly checked. Failure to do so will inevitably result in disaster!
Safe storage of data cards while in the field is also a must. We use Gepe Waterproof CardSafe Extreme holders. It's prudent to format cards rather than simply erase old files as it is best to use a new directory structure for each session. We are in the habit of placing empty cards face up in the card holder, reversing their position when full. We also decided to add some extra storage to ensure our production is backed up from our laptop on a daily basis while away from home. We can't over emphasize the need to carry adequate disk space. External hard drives are now small, cheap, provide redundancy and ensure any kind of disk failure won't ruin your trip. We use a Western Digital 500 gigabyte that stores easily and relies solely on USB connectivity (doesn't require a separate power supply). We actually carry two units to be completely safe. In the same vein, it's also practical to have fully charged spare batteries for your camera body and flash unit on hand. You'll be surprised at the number of people you will encounter that are unprepared for catastrophe, especially with dead batteries or depleted flash cards or other storage media.
We use a BLUBB (Big Lens Ultimate Bean Bag) when we shoot from the cab of our truck. We also carry an Ameristep Doghouse portable blind with us with a couple of collapsible Walkstool's for seating if we encounter a situation where our truck can't be used as a place to hide.
A great place to buy peripheral equipment online is the Naturescapes Store. You will find their prices competitive and the proceeds help to offset the costs of running the Forums and other venues.
Executing in the field and post-processing output are definitely not separate environments. It is virtually axiomatic:
THINKING "DIGITALLY" IN THE FIELD IS ABSOLUTELY ESSENTIAL FOR WORKFLOW SUCCESS DOWNSTREAM
This will become obvious as you employ such processing techniques such as panorama stitching or the high dynamic range compositing of multiple images. For post-processing enhancement, we use a home office microcomputer and a large flat screen monitor that includes such key components as a graphics card with sufficient memory to support PhotoShop. It's also important to have enough hard drive capacity as you may want to process a large volume of files prior to storage in an external archive. As we are now beginning to experiment with print production, we purchased a good "wide carriage" printer capable of handling larger paper types and sizes with good color reproduction. To ensure a tight control over color management (a subject we treat in the next synopsis), we hardware calibrate or "characterize" our monitor with the Colorvision DataColor Spyder2 system.
As dust is the bain of every digital photographer, you will need to continually ensure your lens and sensor are clean and operational. For lens cleaning, we use an Hakuba air bulb, lens pen and microfibre cloth for quick cleaning jobs. For a more demanding task, we use ECLIPSE lens drops and a soft, lint-free PEC*PAD suitable for sensitive surfaces.
The sensor is a separate matter. Somewhere in your equipment literature the manufacturer will undoubtedly warn against touching the surface, an action that may even void the warranty. However, sensor cleaners are now in fairly widespread use. We use a lens pen designed for this purpose (triangular with edges that allow corner cleaning) and follow a recommended process with excellent success. This is definitely an individual choice and should not be attempted unless you are prepared to live with the consequences.
The best online source of field clothing, especially footwear, wet weather and camouflage gear, is Cabela's. Our preference is to utilize light rain and wind resistant outer wear over inner "layered" clothing. Knee high rubber boots are invaluable when treking through the bush as water is often encountered in the most unlikely places. For certain locations, we exchange our hiking boots for their Dura-Trax rubber footwear.
You will also need to pack for air travel, day hikes and protect your equipment from habitat and the weather. We carry a Lowepro Pro Trekker AW II back pack for day trips and protect our equipment with a combination of OP/TECH Cylindrical neoprene lens hood hats, LensCoat camouflage pattern breaks and waterproof storm jackets.
We try to keep our gear with us at all times when travelling, especially by air as baggage handling is an inherently harsh process. This also helps to reduce the risk of theft. The Airport Security Bag available from Think Tank Photo is designed to take the maximum amount of gear on a plane as legal carry-on. An alternative is the 1510 hard case available from Pelican Products.