Bird, wildlife and natural landscape photography at any level requires thought and thoughtfulness. Positioning takes time, camera settings must match the prevailing light, a certain ethical standard must be observed and a degree of common sense is required as we share the outdoors with other enthusiasts. In order to understand the "basics," you must first become familiar with a few concepts and some common terminology digital photographers use daily, whether in the field or at the computer. These apply no matter what equipment you are using and appear consistently throughout this blog. Our intent is to hopefully provide a foundation from which an absolute beginner can progress painlessly toward producing pleasing output and conversing with other photographers. Although the jargon can be truly daunting at times, don't be put off as digital has leveled the playing field considerably. Understanding and adhering to the basics will put you in good stead throughout your learning experience. Although our approach may appear to be overly simplistic, in our experience beginners routinely ignore the basics, the fallout of which is lost opportunity or simply poor results. Our bias is to try and distill the prevailing level of complexity, allowing a beginner to grasp the key issues quickly. At the very least, we hope it provides insights into the challenges each photographer must face when elevating a picture to the level of a photograph.
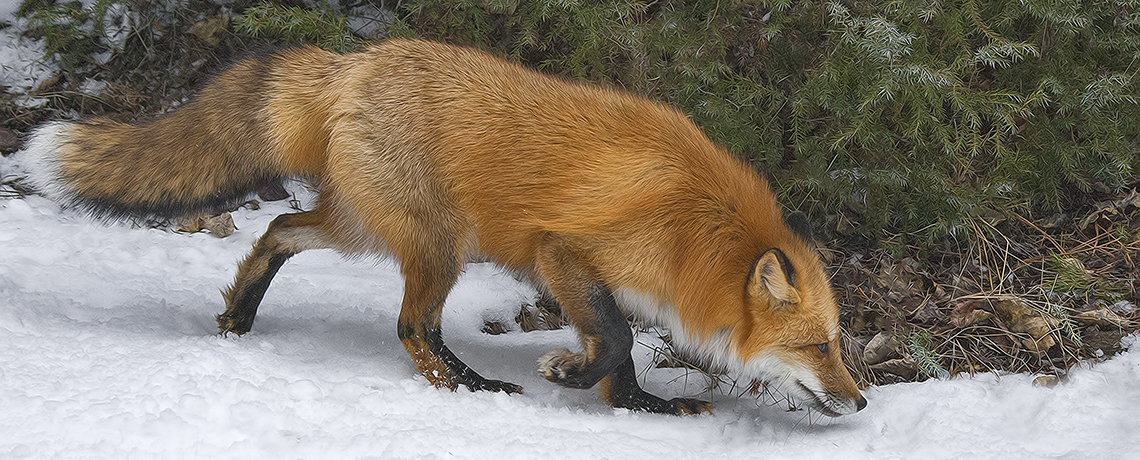
At the risk of sounding obvious, all photography requires a SUBJECT. When planning a field trip, you will often hear this referred to as the TARGET SPECIES, either birds or some other form of wildlife. Preparation is extremely important as researching the location and behavior of a species will help immensely to improve productivity, comfort and safety while in the field. From a practical perspective, you'll soon discover that it's prudent to select locations where birds and wildlife tend to concentrate. It's far more productive than an unstructured walk in the woods!
Once on location, there is absolutely no point in taking a photograph unless you have made the effort to position accordingly. Here, patience is definitely a virtue and the critical variables more often than not are very difficult to control. Your task is to balance the somewhat unpredictable nature of wildlife behavior with the need to position such that you maximize the use of prevailing light and minimize any distractions from the surrounding habitat that will keep the subject from being the focal point of the intended photograph. Very easy to say but difficult to do!
In all photography, it's axiomatic: light illuminates and shadows define. To start, a photograph requires light, either natural or electronically produced. AMBIENT LIGHT is sunlight. FRONT LIGHT is ambient light projected from directly behind your photography position, usually fully illuminating your subject and casting your shadow as you look ahead. Although this position is often difficult to achieve, consider this the optimum lighting condition for most bird and wildlife photography. SIDE LIGHT is sunlight that originates from either the right or left of your position and usually casts shadows on parts of the subject that may require electronic light to reveal hidden detail. Consider this the optimum lighting for most natural landscape photography. BACK LIGHT arises when the sun is behind your subject, creating a dark profile.
BACKDROP is whatever habitat either surrounds or is directly behind your subject. Again, the task is to eliminate conflicting habitat, leaving a pleasing backdrop that will stand as a contrast to define the subject and generate the best COMPOSITION possible. You're goal is to create an image with "punch," eliciting a positive response from yourself and your viewers.
If the above all seems rather self evident, here's where the rubber meets the road! Before taking a photograph, or EXPOSURE, you must make three key camera settings that are appropriate for the lens you are using: ISO (for sensor sensitivity given the amount of light available); SHUTTER SPEED (for subject movement); and, APERTURE (for subject detail). This last setting is referred to as DEPTH OF FIELD and is simply the position of the subject relative to the plane of the lens, either parallel or at an angle. The trick is to learn how to read and translate the level of prevailing light into settings that will deliver the best exposure possible. More often than not you will encounter less than optimal conditions and face some sort of "trade-off." For the most part compromise is the essence of all photography and a lesson that must be learned early on to achieve consistently good results. It will ultimately drive you toward implementing a degree of "control" into your photography experience through the use of a blind, creation of a “set-piece” or to some extent the use of flash.
Although you often have little control over positioning when approaching a subject, you are at least in full charge of making the camera settings. In our opinion, movement is the critical variable when photographing birds and wildlife. As such, your first and perhaps most important task, is to select an ISO or sensor sensitivity that is appropriate for the amount of light being cast on the subject. In general, a low setting is good for a sunny day and a high setting is better for dawn or dusk when light is low. This will get you closer to selecting the appropriate aperture (size of the opening through which light passes as it proceeds from the lens to the sensor) and shutter speed (amount of time the aperture remains open). This latter choice may be as low as 1/200th of a second for a relatively comatose subject to 1/1600th of a second for a bird with a moderate wing flap. An aperture of f/5.6 may be appropriate for a subject standing parallel to the lens (little or no depth of field) while f/11 or higher may be appropriate to capture detail between the head and tail if the subject is at an angle (more depth of field). This will depend on how close you are to the subject given the lens you are using. That's it, just three settings! Experience will dictate how you optimize each. As we have already pointed out, there are invariably trade-offs and your challenge is often reduced to simply "working with what you are given." In other words, most wildlife photography results in compromise as light, position and subject behavior usually combine to produce less than optimum conditions.
It is also extremely important to control camera shake while taking an exposure. This can be done through breathing and posture if the camera is HANDHELD or by placing pressure on the lens hood if a TRIPOD is used.
The best part of digital photography is that it provides instant feedback. Besides a small built-in monitor, most high end digital cameras produce an HISTOGRAM or graphic representation of the tonal range or "brightness" component of the red, green and blue colors that comprise an image file. In our opinion, the histogram has a definite but limited use. Many novice photographers often make the mistake of using this feature as a measure of the quality of the exposure. We recommend you use the histogram to assess CLIPPING only (areas of the image that are either over or underexposed) as a means to fine tune the three critical camera settings identified above. You may have to OPEN UP (let more light in) or CLOSE DOWN (let less light in) to help achieve the objective of producing the best exposure possible. You do this by adjusting aperture, shutter speed or both given the ISO of choice. This is easy to do "on-the-fly" as settings are visible through the VIEWFINDER (eye piece through which you control composition). Otherwise, we feel the small camera monitor is useful to assess composition only. To maximize use of the histogram, purchase a camera body that has a HIGHLIGHT ALERT feature. This will also help to visually assist with "on-the-spot" exposure compensation. More on essential camera features later.
While in the field, it's also important to be continually conscious of the moral dilemma we all face while photographing a subject as every shot we take is essentially an encroachment into their living space. Ethics is therefore an extremely important aspect of bird and wildlife photography. You should be aware from the outset that attitudes vary widely amongst environmentalists, birders and photographers as to what constitutes acceptable field behavior. You will often hear that some photographers can be very intrusive, generating a negative public response that is not helpful to the more thoughtful participant. Arguments while in the field are certainly not uncommon and, as with all ethics, the nuances can create a contentious atmosphere where there is little remaining other than frayed nerves. Notwithstanding, common sense dictates that it is imperative we all refrain from unduly placing stress on a subject or the surrounding environment. This is extremely important, for example, with nesting birds. As such, we attempt a more in depth synopsis of what we feel are the salient issues later in our blog.
The term WORKFLOW PROCEDURE describes the myriad of tasks you will face once you return from a day in the field. This encompasses downloading, editing, processing and archiving image files. Although the lexicon of the microcomputer is a literal minefield, there are a few critical issues that stand out. Most important is COLOR MANAGEMENT, a term used to describe the need to calibrate your monitor and install printer profiles that ensure "WYSIWYG" (What-You-See-Is-What-You-Get). Most bird and wildlife photographers use the ADOBE RGB (1998) color system and capture files in either RAW or JPEG format depending on the degree of control desired when post-processing in an image enhancement program. Most choose the former as RAW images retain maximum data and allow unfettered access to the higher end software enhancement feature sets.
Adobe has set the standards for file management, RAW conversion and enhancement. Their software offers access to increasingly sophisticated feature sets from the relatively simple ELEMENTS to the more integrated LIGHTROOM and PHOTOSHOP. As you progress through this blog, we provide recommendations on how best to use the software alternatives available, summarizing all the important tools and outline a quick, seven step procedure for enhancing image files. We also provide workflow alternatives such as the downloading and archiving solutions offered by BREEZE SYSTEMS, a mainstay in our workflow process. However, you should be aware that no amount of downstream processing can correct a poor exposure! So take your time and concentrate on field basics as creating good exposures definitely pays dividends later in the process.
That's it, bird and wildlife photography in a nutshell! It's basically positioning, three key settings and a properly configured computer. As you progress through the text, we expand on these concepts and hopefully help you avoid the major pitfalls that we encountered early on. You'll soon find it's a great adventure, providing challenges and surprises at every turn.